
I'm in love...

with Bountiful Baskets!
I've been hearing about it for a year, and finally tried it out. Dude, it's awesome!
I paid $15 for all of that food! Plus when you volunteer (show up an hour before, unload and organize food), you leave with even more.
Go here to sign up (mostly only done in the western states). Do it, try it, love it.
I paid $15 for all of that food! Plus when you volunteer (show up an hour before, unload and organize food), you leave with even more.
Go here to sign up (mostly only done in the western states). Do it, try it, love it.
One "basket" is $15. It's affordable, and not to mention fresh. Each week the baskets of fruits and veggies feature something different, depending on the best prices available, which actually makes it a fun surprise - "It's like Christmas", as I say at 7:30am volunteering. You'll see.
Recently, I got two eggplants - never, ever, would I touch those things in the produce section. But now I'm going to try making eggplant parmesan! So excited!
Typically what I don't eat gets chopped up and frozen for soups. It really is a bountiful basket. Love it MUCH! Now go try it.
Recently, I got two eggplants - never, ever, would I touch those things in the produce section. But now I'm going to try making eggplant parmesan! So excited!
Typically what I don't eat gets chopped up and frozen for soups. It really is a bountiful basket. Love it MUCH! Now go try it.

My other love: Bread making.
These are just some action shots of the bread I was loving on.
Double batches are my friend. They make gargantuan blobs which are so fun to play with. Bella loves to dive in and play, too.
These are just some action shots of the bread I was loving on.
Double batches are my friend. They make gargantuan blobs which are so fun to play with. Bella loves to dive in and play, too.

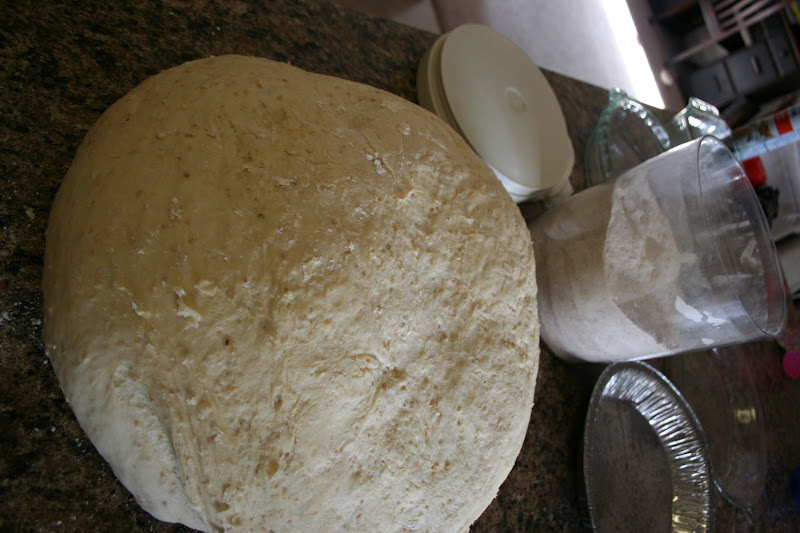
Gooey goodness. This is once it's risen the first time and ready for whatever your heart desires. This time they became rolls. But the dough is great for pizza crust (add some italian spices and parmesan!), bread sticks, cinnamon rolls, or anything else you can think of!

Already posted this recipe here, but this time added the directions for any first-time bread makers out there. For me, the first few times were a major fail, but I feel like I've finally mastered this recipe. Each time using different flours and sugars, this recipe produces a consistent deliciously textured dough.
Grandma Collett’s Dough
from Camille Henrie’s mother and used by Emily Henrie for EVERYTHING
2 ½ c warm water
1 ½ tbsp yeast
1 tbsp salt
½ c oil/shortening
½ c sugar (any kind)
5-6 c flour (any kind)
Directions
1. MIX the first 5 ingredients in bowl and let sit while yeast works (Between 5-15 minutes). Once it’s bubbly and looks foamy. Add the flour, one cup at a time, mixing thoroughly between each cup, until you have mixed in 4-5 cups flour.
2. KNEAD. (This part is what takes practice. It’s hard to explain!) With remaining flour, sprinkle counter and hands with flour (to avoid sticking), dump dough out on counter and start kneading. I basically fold the dough in half, and use the palms of my hands to press it together. Knead for about 10 minutes, or until it passes the finger-poke test*. It goes from being soft and squishy to feeling more tough and springy, like gum that’s been chewed too long, except it’s springier. Okay, gross visual, but you get the idea.
3. LET RISE. Next, leave on counter and cover, OR put back in the bowl, covered (a hot dish cloth or saran wrap does the job!). Let sit until it roughly doubles in size (45 minutes-ish, depending on impatience).
4. FORM DOUGH. Transfer from bowl to counter, and knead to get air out of dough. You may need a little bit of flour so you can work with it. Knead for only 1 or 2 minutes, and it’s ready for whatever you need it for! If making rolls, cut into golf-ball size, and form balls with hands. If making bread, fill the pans half-full with dough. If making cinnamon rolls, sprinkle counter with flour and roll the dough with a rolling pin, followed by melted butter, and a cinnamon-sugar mixture. Roll up, slice and place in sprayed pan.
5. LET RISE AGAIN. Once ready, cover the dough with saran wrap and let rise for at least 60 minutes. I usually let it rise closer to 90 minutes, which will give you magic fluffy rolls. I’ve tried it with all different times and flours/sugars, and it’s all in the rising time. That gives you maximum fluffy rolls! To speed things up, I turn my oven to warm, crack it open, and put the rolls near edge to encourage rising! Or put in microwave, with a paper towel wedge in the door to keep the light on. Heat, moisture, lots of rising!
6. Bake at 350, cool and devour!! For the giant rolls I make, I bake for 24 minutes, until tops are nice and brown. If it’s a loaf, go at least 45 minutes. Doughy middles are no-bueno!
Note: *Finger-poke test is exactly what it sounds like. You poke the dough and you watch to see how quickly it fills in your ‘poke’. When it springs back quickly and mostly fills in, it has passed the test. If it doubt, keep kneading.
No comments:
Post a Comment
I ♥ comments!